Design a site like this with WordPress.com
Get started

Print On Demand Tool – Canva.com – Designs Created Easy!

Kia Ora Whanau!

Welcome to another blog post about my Passive Income Journey through Print On Demand or POD from now. Today I am going to start off by covering off the main product I use to well … create designs (huh kind of figured that out from the title right??).

First off – if you’re new to this blog, welcome and if your like me, you are trying to generate a bit more of a passive income. I suggest you read my previous blog posts under Passive Income to come up to speed with everyone and also further help you get to where you want to be (especially if you’re new to this world).

For those that learn better by listening I have also completed a podcast episode on this topic and will be expanding on this. You can find the podcast episode here.

So to start things off – What is Canva.com (Canva)? Well simply put it is a website where you can create designs for thousands of different products. These can be anything from business cards, Instagram posts, T-Shirts, Posters and of course custom designs (This is for the POD use). The best thing about Canva is once your design is complete you have the full legal right to use that design for things such as POD.

I will be showcasing a bit about what Canva can do and don’t really delve into how to do every little thing but you will see that it is very simple to simply click an object and usually edit, or place this.

Full Disclosure: So I want to be completely open and honest, I am a Pro Canva user (Meaning I pay their subscription), and while I am not affiliated with them I am a strong believer that for me, Canva works. That said, I will cover off another “Design” product in the future (Look out for my upcoming blog and podcast on “Place-It”) that is also used by a lot of people but I choose Canva over this website.

But what is Canva exactly?

Canva is primarily used for word based templates and designs, but this does not mean that you are only limited to text. Far from it, as you will see. You can create thousands of designs (that’s just using their fonts, but when you see the free Elements, Backgrounds, Photos and the ability to upload your own image and you will see there is a reason why Canva is as good as I am trying to promote it!

How much is this gonna cost me?

Ok so I mentioned that I am a pro user and that means there is a subscription service. The cost is $12.95 USD (or in NZD $20.07 per month. YOU DO NOT NEED TO BE A PRO USER TO USE CANVA!!!

However, being a Pro user does give you a lot more access to their resources and most importantly, every design you create can be made into a transparent background … I’ll be honest this is the main reason I originally became a Pro user lol. Yes you can download the free designs and make your design transparent another way but with one click of a button … it’s much easier 🙂

You can also easily determine what is Pro or Free by hovering over the design/ photo/ element and looking for ‘Free’ or a ‘Crown symbol/ Pro’.

Now I will get into more about Pro user benefits a little bit later. First I want to start with some of the things you can do.

What Does Canva Look Like?

The basic Canva screen

As you can see from above, this is the main Canva Screen and just at first glance it doesn’t look like much but trust me if you are starting your POD business you should seriously consider looking deeper into Canva.

I briefly covered what some of the benefits of Canva can be used for but I’ll be honest I have barely scratched the surface. I strongly suggest you head to their website to check it out to see if it meets your needs.

What I will be doing is giving a brief overview of all the things you can do for your POD designs.

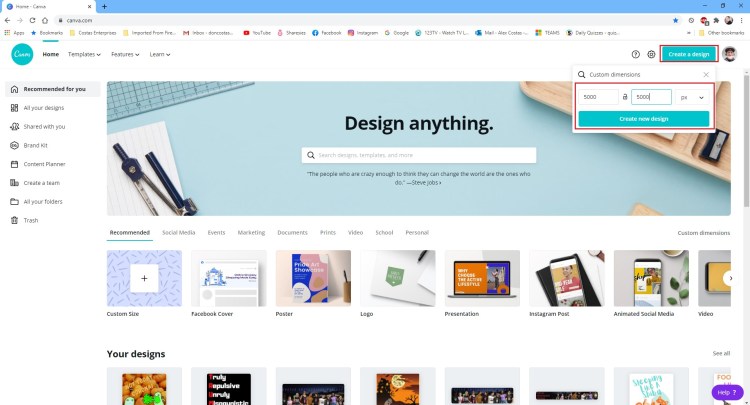
For this I will be creating a Custom Dimension Design of 5000 Pixels by 5000. Once you click the ‘Create Design’ you will be taken to the below default screen.

Templates

The Templates Screen

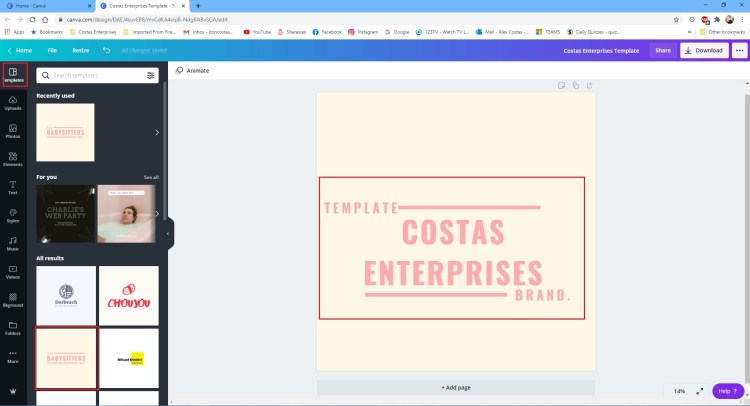
As you can see there is a Navigation Bar on the Left Hand Side. Click on one of the buttons on it and a further frame should expand. In this case it is the Templates frame. You simply click on template you want to use/ change and in the Reader window you can begin editing.

The cool thing about templates is most are created by Canva Designers so all elements, lettering, colours all flow and match together. You can simply click one part of the Template and change to what you want. Above I changed the original template and moved the text around a little. The above only took about five minutes to edit and frame up.

Uploads

Upload your own image or design

So next up as you can see is Uploads. This one is pretty self explanatory … you can upload your own image and/or design and then add them to your canvas.

Pro Tip: In this case pro means Canva Pro – You can click on an image/ photo (either uploaded or one provided by Canva and you can choose ‘Effects’ up the top and a new frame appears where you can click Remove Background. This tool is amazing. It does a great job of removing a lot of the background and means you can easily apply a potential background change to your image.

Photos

A selection of photos are provided by Canva

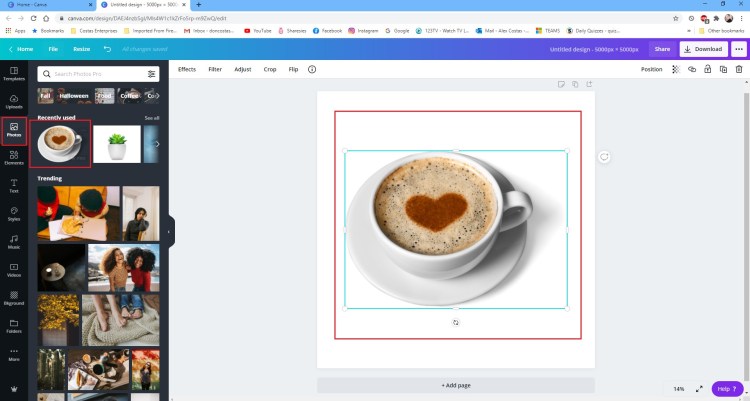
Canva has a lot of photos for you to use and I’ll be honest the search is actually really great! You can usually find a high resolution photo mostly towards what you are wanting. Now of of course you won’t find any potentially copyright images or famous figures – If your thinking of making that Trump design your gonna struggle but if you search broadly then your usually going to find something. Now of course there are still the same restrictions with a free account but you will still be surprised with what you can actually use.

As I mentioned earlier, if you are a Pro user you can also use some of the cool effects like Background Remover.

Elements

Elements Like Clip Art only Elementary …

Here we are … this is where the magic starts to form! Elements, as described by the caption, are like your own version of Clip-Art from the old Microsoft Word days!

If your not a design person but maybe you’re an ideas person (like me .. well that’s what I’m saying in this instance) this is where you can start to put your ideas into paper.. I mean Canvas/ or is it digital canvas? well anyway what I mean of course is this is where you can start developing your own designs without even having to learn how to be a designer.

Now this is no diss to any of those designers out there – I wish I had some of their skills, but those that can’t do … create a search in Canva and place it on a digital canvas!

I know it’s going to feel like sounding like a broken record but as always the advantage of a Pro user is of course more Elements etc.

Text

What Canva was originally designed for – Text

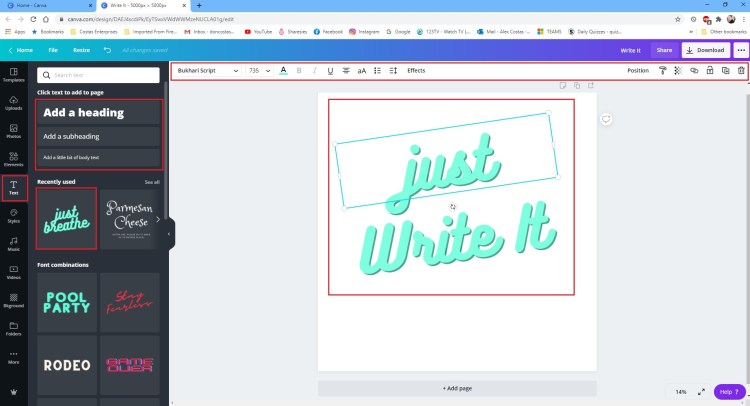
I said at the start that Canva focuses more on it’s Text fonts and for good reason. There are over 100,000 fonts to choose from. It is also really easy to just start typing and change your mind with the font given, or one you want to use.

As with all the previously mentioned functions, you will notice that the left page also has some mini text templates that you can simply click and then begin editing that style – I have highlighted this in the image above but can’t stress how quick and easy it is!

You also have some additional effects you can apply to your text as well as look at things like line height and of course change styles and transparency.

Styles

S.T.Y.L.E Spells Style man!

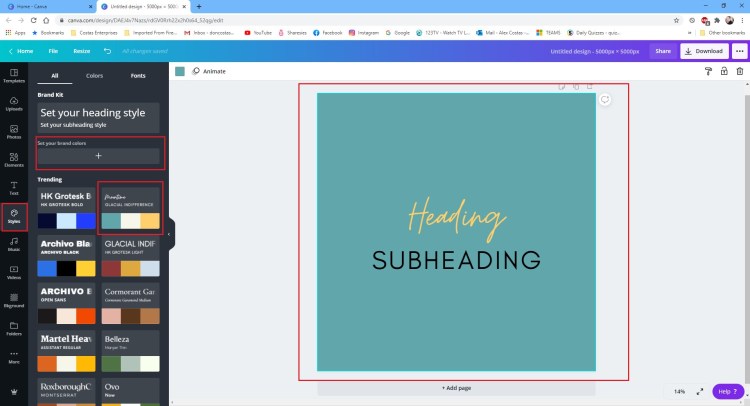
So what are styles? Styles are away of applying a colour and font scheme to your design. This is really handy if you need to set up a business colour scheme! If you are a Pro user you can ensure your business style is always available and once you have a object, simply click your style on the left and everything about your object gets styled the way you want it. This makes everything consistent … which is great for your brand.

Music & Video

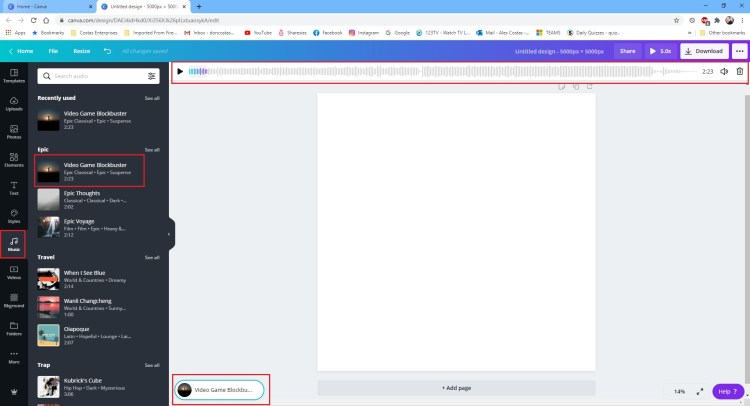
You can also add Music and/or Video to your design. This is something you could do with your Facebook or Instagram posts but not really needed for a POD design for uh obvious reasons I hope …
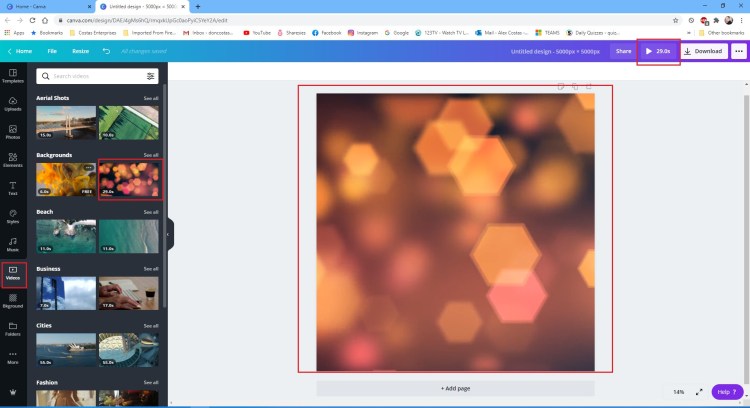
Backgrounds

The digital canvas needs to be filled sometimes …

Similar to Photos and Elements, you can also have Backgrounds added to fill your open space. These are not just photos but also colours, abstract and even animated designs.

A well picked background can make your design pop or may even hide some potential issues with an uploaded photo.

Folders

Where is my stuff??? oh right here under Folders

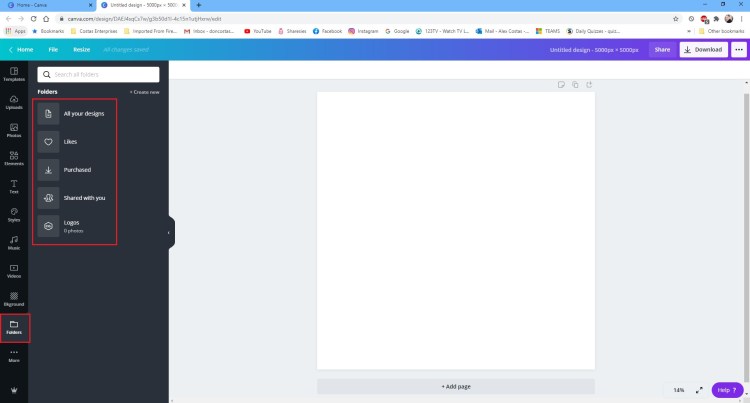
This is like your document management system… or in very simple language – think of this like your ‘My Documents’ or ‘My Computer’ file structure.

The most common use will be to access all your previously created designs or any images/ text you may have liked for quick access.

More Functions

Integration Time! Discover more of what Canva can link with in this section.

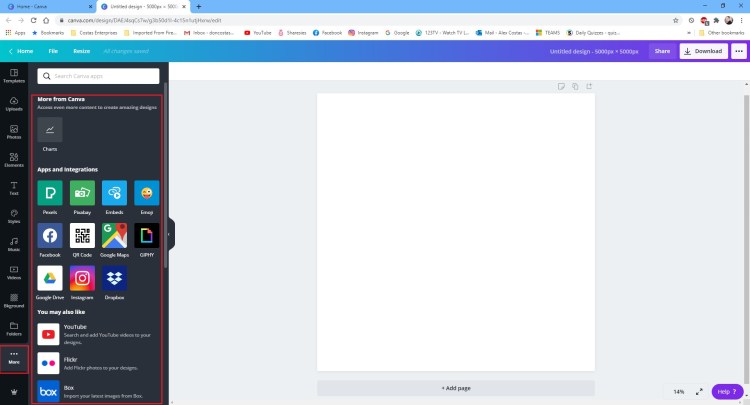
The “More” section is where you can see the other cool features or ‘plugins’ that integrate with Canva.

From Instagram and Facebook to adding your Bitmoji. When you delve deeper and see what you can create on Canva you will understand why this website is a must for future Social Media Influencers wanting to ‘Trending Up’ their brand.

Pro Features – A look inside

Just a glimpse of what $12 USD or $20 NZD gets you …

The above image explains a little bit more of what you get for your “Pro” subscription. I have advised most of the features but you will notice I left out some features which you are more than welcome to pop along to Canva to check out a bit more in depth.

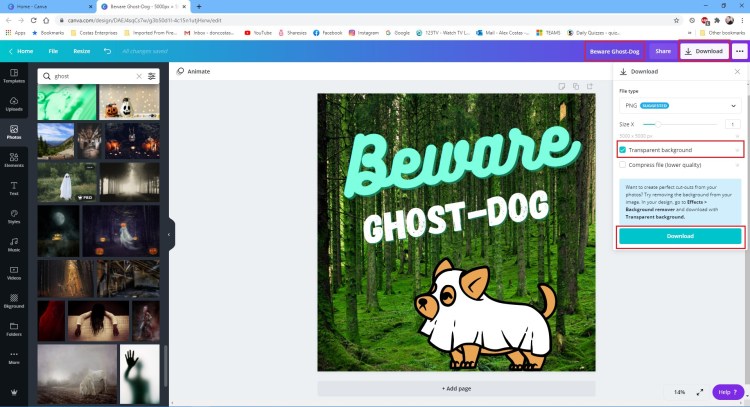
Putting it all together

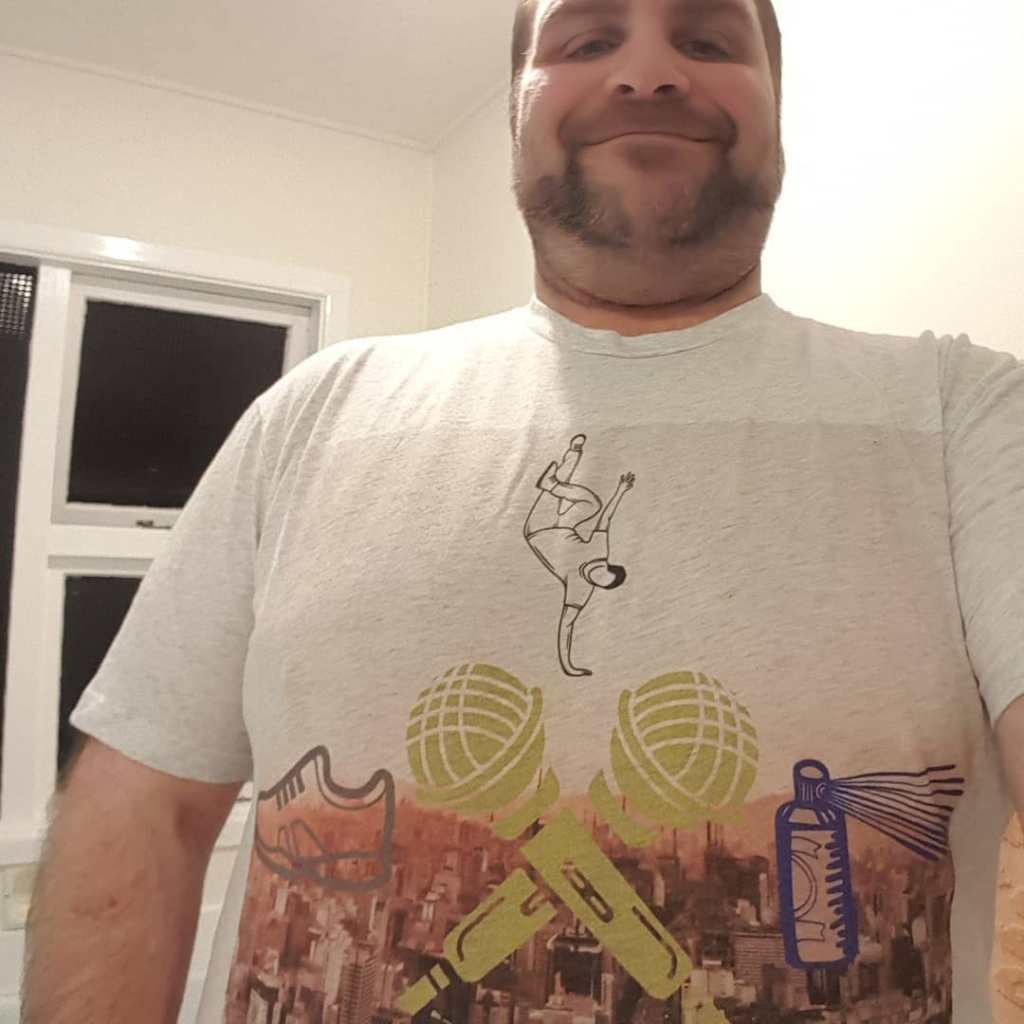
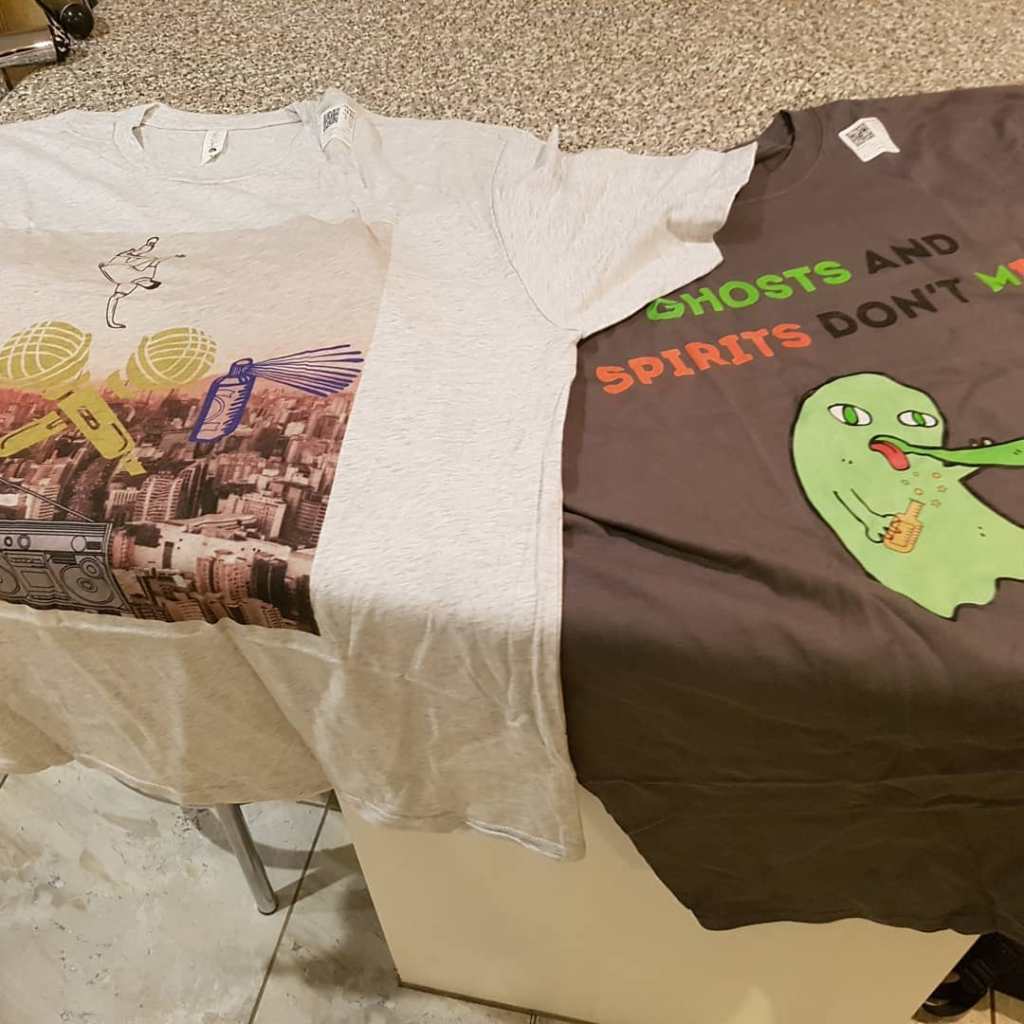
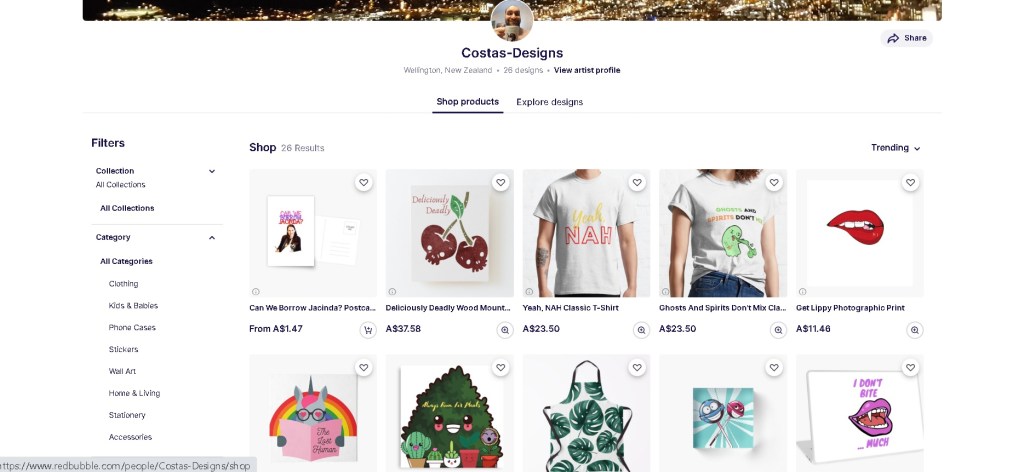
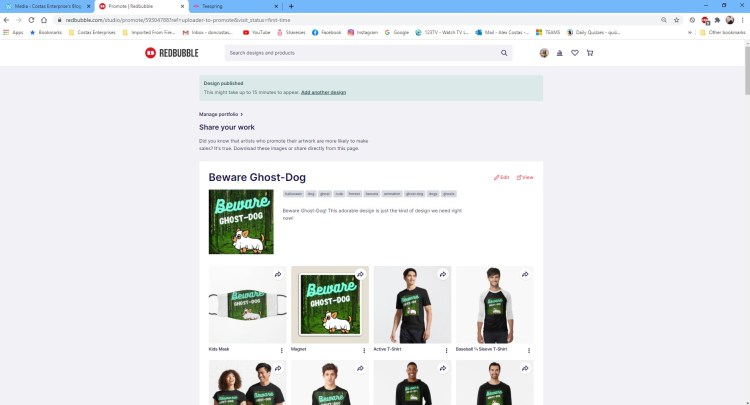
So the next few images will be incorporating a background, text, elements and also show the Transparent Background button when you download. You will also see the design uploaded to Redbubble and TeeSpring.

This design is live now and feel free to check it out here to see the elements all working together.

Conclusion

Well I have already said that I love Canva so there is no point in me going against that. But the main reasons I love Canva are because I honestly didn’t think I was that much of a designer and this was a tool to help me achieve a goal of getting a design created and uploaded.

On a personal note I got a pure thrill when my designs arrived and I put them on for the first time. It makes me feel like I can get my artistic side of the brain flowing.

I suggest if your looking at starting your POD journey then seriously consider Canva as a great resource. Now if you have and use programs like Adobe then by all means use it!

If your like me however, I prefer to start simple and Canva makes it pretty easy.

Until next time – Thanks for reading and good luck.

Also if you want to support me, feel free to email me at doncostas@gmail.com or leave a comment … or buy a design 🙂

Passive Income – Redbubble Review .. Wait I got a sale???

Kia ora Whanau!

This post is going to delve into a bit more about my passive income journey and will cover off my first “organic” sales through the print on demand (POD) service. I will also be mentioning the other sites I use for POD so expect to be taken down the rabbit hole on some of the other POD sites as well.

Ok so if you read my last blog post Creating a Passive Income then you will know that I started creating two previous POD’s websites. Threadless, TeeSpring and now my new site is for Redbubble.

So what made me try Redbubble? Well honestly a lot of youtube videos where I am learning these skills from suggest TeeSpring, Redbubble and Merch by Amazon.

I have been doing POD for about 4 months now and can say that out of all three of the sites the one site I no longer use or upload to is Threadless. Teespring is a good site but going through the checkout and costs for more than one item can be a bit … painful. So I decided to try my hand at Redbubble.

So are you gonna review the other two? – Yes, in time I will review the other two but for this post I am just going to summarize my thoughts on using Redbubble. If you want to hear more of my journey feel free to listen to my podcast Get A Job and Get Healthy With Costas Enterprises.

Is it actually any good?

Yes. I’ll be honest with you all, there are some really good advantages from using Redbubble veruses TeeSpring, but on the other flip of the coin there are also some great things about TeeSpring that Redbubble doesn’t have.

As always this is my own opinion and my experience, I am learning about this just as you are.

Pros of Redbubble

So there are a few pros and I will try to explain them here as best as I can and why this aspect is better than the other two POD’s I am currently using.

  1. Tags

What like FaceBook? Well not exactly but in a way … kind-of.

For those that don’t know, Redbubble uses ‘Tags’ to advertise or promote your products. Depending on what you search for, or what you click on, Redbubble will suggest your design based on the tag that you assign to your design.

What I mean by this, is say for example you are looking for a design around “succulents”. Any designs which use the tag “succulent” will start to appear from your search. Note: Your design may not be the first to show up, however it is there trust me. Redbubble has a way of filtering your designs from you.

So why are tags good? – Simply put – if you create the right tags on your designs you will generate more traffic to your design. Redbubble ask that you don’t add more than 50 tags to any one design. They can also check if your spamming your tags and if they deem this to be true they will remove your design. An example of spam tags are putting “Mask”, “T-Shirt”, “Red”, Orange” etc..

The other cool thing about Tags, is that unlike both TeeSpring or Threadless, once a tag is on your design Redbubble will start advertising this after 15 minutes of you publishing the design.

How are tags different from TeeSpring and Threadless?

Because of the way Tags work, your design will start being advertised almost immediately. With TeeSpring there is the issue of the Trust Score. TeeSpring’s Trust Score means they will do the marketing of your product for you, but only after you have achieved a positive Trust Score.

When you first start with TeeSpring you won’t gain a Trust Score until you have at least sold 1 – 25 sales (meaning you have to market your site yourself). Threadless also use Tag’s for their designs but the main problem with Threadless is they are just not big enough. This means they don’t have as large as an audience to use the tags effectively.

2. So Many Products

You read that right, Redbubble has a huge selection of products for your design to be printed to. Not just the stock standard T-Shirt like most POD’s but also items such as Clock’s, Mugs, Hoodies, Leggings, iPhone Cases and even notebooks.

An example of products that Redbubble offer on my site.https://www.redbubble.com/people/Costas-Designs/shop?asc=u

Now TeeSpring has a huge selection of products as well but Threadless is clearly dead last in this category.

Of course with Covid 19 all of these POD’s now print masks as well.

The other advantage of the products with Redbubble is that once your design is uploaded, you will see a mockup of the design on the potential product very quickly.
REDBUBBLE TIP: If you do upload to Redbubble – check every product you want to upload, sometimes your design will not be centred or will be cropped and your design won’t look right.

How are products different from TeeSpring and Threadless?

So let’s get this out of the way at the start, Threadless is dead last for a reason. They do make great products as they originally started as a T-Shirt business and expanded into POD. The reason they are in last place in this instance is simply because they don’t have the audience/ following that the other two have. This means less sales. Threadless do have some cool variations from TeeSpring and Redbubble such as Skateboards (which I was not expecting from any of the POD sites).

TeeSpring has a wide selection of products and I’ll be honest out of the three TeeSpring feels like you have more control over the creation of the products. Uploading may not be as easy as it is with Redbubble but that is where TeeSpring lets you see the design on a mock-up of the design while you are uploading. That said TeeSpring does make it a bit tedious to upload because you have to tick every single product you want to upload with your design meaning these are not selected by default. Redbubble will start with alot of products already selected.

TeeSpring Upload Tip: When uploading make sure you edit your price here before you publish the product. Also TeeSpring will put the cost of the product up to make you a product … this profit is sometimes too high meaning you won’t sell as many because your trying to make $7USD profit on a mask (for example).

3. Ease of Setting Profit

Ok this is what we all want to read .. how much profit can I make if I make a sale??? Well let’s get into it now. Setting your price-point for the three sites are different in each site.

Redbubble

Setting your price point for Redbubble is not about setting an actual amount but more a percent. Now if your new to Redbubble it took me a few minutes to find where to set my profit margin but now I know it is really easy (basically look on the Left Hand Side Dashboard). The other advantage of this is Redbubble allows you to set the percent across all the products, meaning set it once and walk away.

Don’t get greedy, I currently set my percent to a 7% profit on Redbubble – This is not a huge margin compared to other sites and will result in a small profit for you then click apply to all and all product have the same profit margin.

If your design is any good you will sell lots of them and then that’s when you start earning and this is the same for all POD sites!

TeeSpring

By default TeeSpring will set a profit margin for you, be careful with this as the profit margin is very high. They want to cover their cost and you to make your money as well … but if the item is priced too high it simply won’t sell. I aim to make $3- $7 (USD) on some items but remember the TeeSpring Trust Score – you don’t sell anything then you don’t get added to their marketing. I suggest keeping the prices low to start off with and take the hit of a few dollars on each item until you start selling more than 25 sales. You will have established a Trust Score by then so new items can be priced a little higher. Notice that I said new item and not old items … That is the disadvantage of TeeSpring – once you set a price you can’t edit it. You would have to delete the item from your store and then re-upload it to change the price.

Threadless

You can’t really change the prices of your products for Threadless – Also the profit margin you get is close to $1 -$3 (USD) per item. This effectively means unless you sell lots your going to make very little.

So how do I get paid??

PayPal is your friend – All of these sites will prefer you to be paid by PayPal and they will pay you in the currency of USD (as all these sites are based in USD). Make sure your PayPal is set-up correctly in the name of your bank account … otherwise you won’t get paid.

4. It’s free to set up

So with all three of these sites they are all free to set up. You just upload the design and your done. The main advantage of Redbubble is that your tags will start generating traffic to your site .. and hopefully sales!!

The Cons

So upfront there aren’t as many Cons as there are Pros and as I have previously said in my podcast episodes. But that is not to say that Redbubble doesn’t have some cons.

  1. Uploaded Designs image issues

Ok so this isn’t the biggest issue to have but one little issue with Redbubble is that when you upload a design you don’t have as much freedom than what you do with TeeSpring.

Wait what do you mean by freedom? – Ok so let me be clear – the upload process for all three POD’s is really easy but out of the three I like a mix between Redbubble (for applying your design to all products fast) and TeeSpring for being able to move, resize or flip the design.

Redbubble uses a sliding scale for it’s zoom which is still easy to use but can be a bit finicky when trying to make sure you dont cut out the whole design. TeeSpring is better in this instance because you have a lot more help being able to use the frame (like if you are adjusting a picture in Microsoft), the trade off being that you have to do this for every single design you select. Not a huge Con I know but still it would be nice to have the mask to make things easier.

The other issue with this upload process is that when you go to edit the scale on the design, a pop-up window will appear and sometimes the preview window is hard to see so you find it difficult to adjust your design and see it change on the preview.

2. Audience

Ok so this is both a plus and a minus for Redbubble. The audience size.

Redbubble has like 40 million views a week … That is great, but because of this it also means that there is a lot of competition. I suggest really think about the designs your putting up. Redbubble is very big on copyright and trademark infringement (not as hard as Merch by Amazon) but still pretty big.

You need to have the right to sell the design you are creating. So make sure that you are not just taking that Dragon Ball Z image of google and uploading it – you will get fined or worse for breaching copyright or trademark infringement law – no matter what country you are from.

Never fear! there are some websites that can help buy giving you permission to use their designs or any design you create in them for POD. One such site is Canva which is what I use for my designs.

Conclusion

In conclusion I still recommend you to upload on all three sites. After all they are all independent and free and there is nothing stopping you from using each one to sell the same product. Redbubble is great and I wished I had started with them earlier but I wouldn’t have learn what I learnt if I didn’t try the others first.

Didn’t you say something about an organic sale??

Thanks for remembering! Yes out of all three sites Redbubble is the only site I have done no advertising for. So it is a surprise that I have made two sales on this site for the same product.

I marketed the Redbubble to America because they have the highest audience and to my surprise as of today 15 September 2020 I have made two sales for the below design.

Now my profit wont be huge, and I won’t get a payout until I make a profit of $20 USD but it’s cool to know that something simple is being sold and I don’t have to do anything else for it – Passive Income for the win!

The Design that sells! Aunty Cindy

Yep Auntiy Cindy aka Jacinda or our Covid 19 Saviour has earned me two sales – One a T-Shirt and one a sticker. I couldn’t be happier.

If you have any questions please feel free to contact me and I will try and make a new blog post every week.

Thanks for reading and sticking right to the end and hope this helped you.

Feel free to check out my Redbubble or TeeSpring sites and give me feedback as I love to hear from my community.

Website Powered by WordPress.com.

Up ↑

%d bloggers like this: